Tuesday, December 4, 2012

Random Acts of Kindness Day December 17, 2012

I would like to ask my friends and followers to designate and keep this December 17 as Random Acts of Kindness Day. On December 17, make a difference in someone’s life. Even if only to bring a smile to their face. Show love, compassion and Christian charity with a simple RAK and expect nothing in return. Believe me; your act will be paid forward to others. And what better time than the Christmas season? Why do I ask this?

On December 17, 2008, my life and the lives of my children were forever changed. As I was leaving the house to go Christmas shopping, I received a call. My high-school sweetheart and husband of 28 years (at that time) was very ill. In the hours that followed we learned he had Stage 4 colon cancer and the doctors gave him mere months. Those who knew Ed, saw an upstanding Christian man who would give you the shirt off his back if only to help someone. Ed went Home on October 6, 2010. I plan to honor his memory with RAK day.

If I had the financial means, I would love to make a charitable donation in Ed’s honor somewhere but that is not possible. I could put beautiful flowers on Ed’s grave, but that would not make a difference to anyone except give me a measure of peace. So, I’m asking anyone who reads this post to please SHARE this post, however you see fit. Help me get the word out via Facebook, Twitter, email, etc.

On December 17, make a difference to someone and expect nothing in return. On that day, simply post: December 17, 2012 RAK day. #BeTheChange #EdRIP #payitforward

Edward Ray Middlebrook – September 20, 1961-October 6, 2010

Monday, April 30, 2012

Bits 'N Pieces (of the Kyjov kroj)


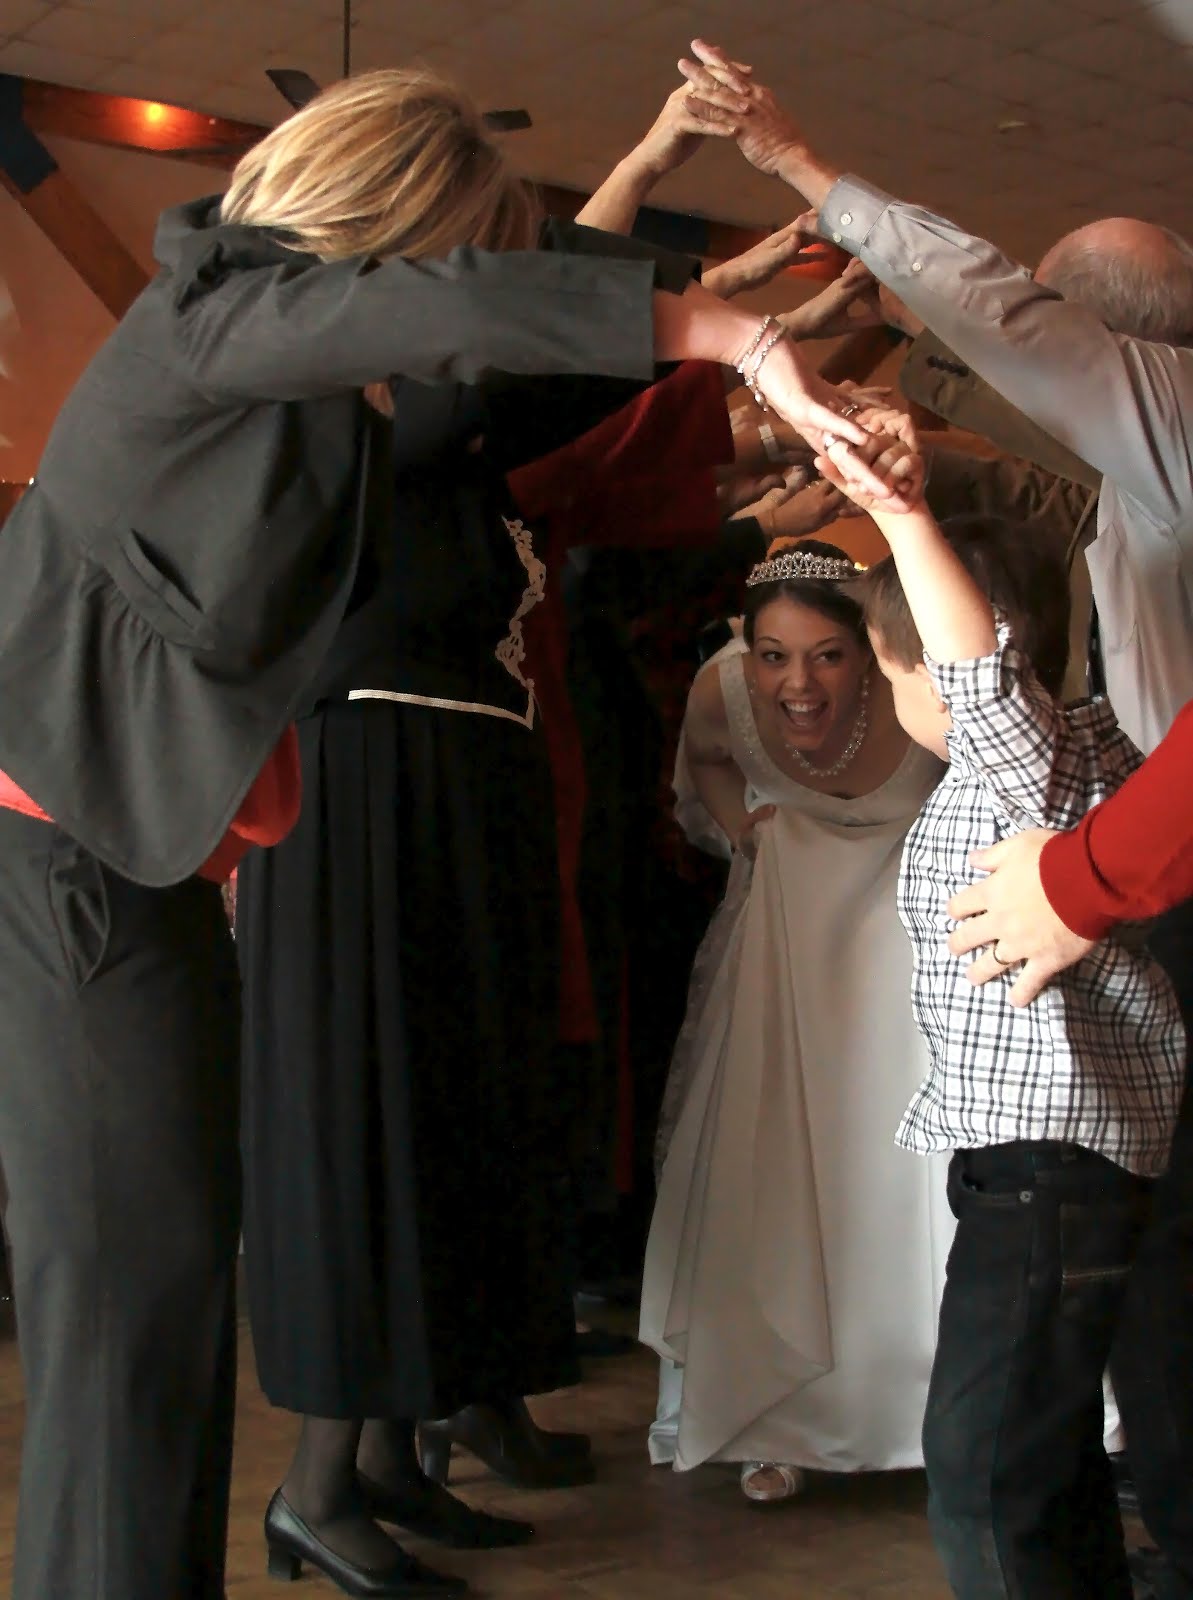
I thought about calling this post FAQ (frequently asked questions) but I think I will start a series (very small series) of "Bits 'N Pieces" of Czech costumes (kroje). And I will add in a disclaimer here...I'm no expert and welcome comments and others to send me descriptions of their authentic costumes. With that said, here are the bits and pieces of the Kyjov kroj. It gets its name from the region it represents in the Czech Republic. For this purpose, I will use the costume I made. I will number the pieces and steps in the order that they are put on. In 2006, my daughter, Sarah, was named Miss Czech Slovak USA Queen at the national pageant in Wilber, Nebraska. The beautiful costume she wore was loaned to us by a member of her sponsor, McLennan-Hill Czech Heritage Society. The wonderfully preserved antique was absolutely stunning in every detail. Please see a photo of Sarah wearing this costume at the end of this post. We will be forever grateful to the late Henrietta Cervenka for entrusting this masterpiece to us for over a year during her reign.

Sometime during that year, I realized that we would have to return the costume at the end of her reign and Sarah would not have an authentic costume. We had really come to appreciate the splendid work on such a costume and I wanted to see if I could reproduce it. The first piece I made was the skirt. I did not know you could buy the red fabric for the skirt with the embroidery from the Czech Republic so I just made it by hand. Long story short, I took one piece at a time, meticulously, drawing out the pattern from the antique costume and reproduced it on the new costume. For complete details on the making of this costume, see the posts (from 2008) of this blog. You will have to go back several pages. The first photo on the blog is Sarah wearing the reproduction at Westfest several years ago.

1. TIGHTS. No mystery here, the costume simply looks better when worn with opaque tights. Panty hose looks too contemporary and when the costume is worn without tights it just looks unfinished.


2. BLOOMERS. I'll be honest here. This is for practical purposes only. I seriously doubt "bloomers" were worn in days of old but I feel they are needed. For those who don't know...bloomers are decorative "panties" (for lack of a better word) that are meant to give the wearer a little coverage (this is really needed during dancing) because when worn properly, with very starched petticoats, the skirt appears very short. The decorative bloomers are worn over the tights. The bloomers we have with this costume are red with ruffles. (Yes, ladies, just like the kind that we bought for our little girls when they were little.) We buy our "bloomers" from Maggie Grmela of Czech Costume Creations. (I have a link to her website along the right side of this blog.)

3. BOOTS. We have black boots for this costume. I would suggest simple black boots. No buckles or even heels (but this is up to the wearer). The boots we have were purchased online many years ago from Chadwick’s of Boston. I couldn't tell you if they still carry this style. They don't have heels or buckles and can be comfortably worn all day. Okay, honesty here and just my personal preference, but I would really recommend simple boots to carry out the authenticity. But, that is just my personal preference. And why are the boots listed as number 3 in the steps? Ah, practical purposes again. A little personal aside here...I can't tell you how many times, while helping my daughters put on this kroj, we forgot the boots until the end and (as anyone who has worn this kroj knows) once you get this costume on (if worn properly) you will not see your feet. And certainly struggle to get your boots on. SO, (getting personal again) I had to put the boots on the girls. Just trust me on this one.

4. UNDERSHIRT. Again, I can't tell you if this was done in days of old but trust me on this, it is vital. This costume can get very hot because of all of the layers. Whether you have an authentic blouse or a new one, you have a lot invested in it and will naturally want to protect it. Wearing a plain t-shirt will both keep you cooler and protect your blouse from perspiration. My recommendation would be a plain white Under Armor (brand name) shirt. The Under Armor shirt is designed to keep you much cooler in hot weather. And (we learned this the hard way) don’t wear a t-shirt with a design because when you sweat the design can bleed on to your blouse.

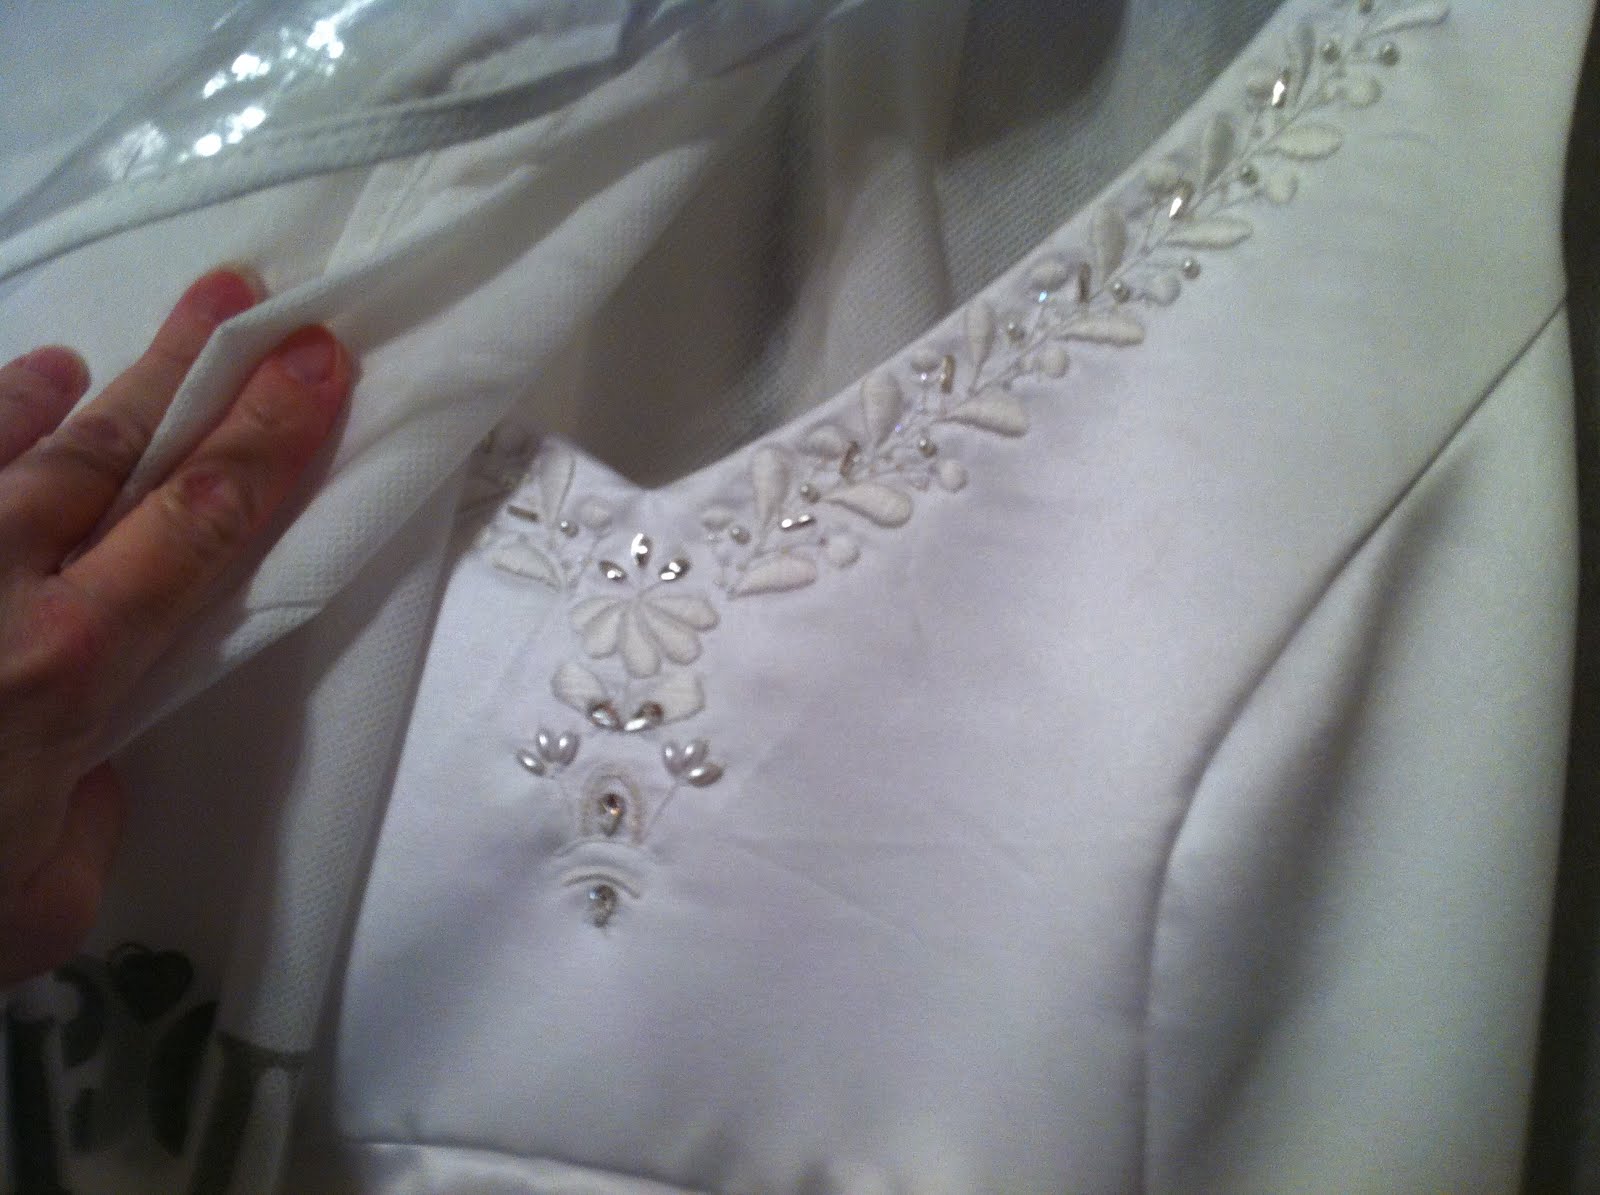
5. BLOUSE AND VEST. We store the vest on the blouse. Why? Because when the sleeves are worn properly they are very full and the vest has to be put over the sleeves very carefully as to not ruin the embroidery. We use little pouches of netting in the sleeves that can be taken out for cleaning. The blouse can be very heavy because of the full sleeves so it is best to have someone to help you put it on. Button the blouse but not the vest at this point.

6. PETTICOATS. The petticoats are much more important than you may realize. The petticoats form the “structure” of the costume. Petticoats should be so heavily starched that they can stand on their own. I use liquid starch sprayed on full strength. Maggie Grmela, of Czech Costume Creations, recommends boiling the starch but I have never used that method. When preparing the petticoats, I spray on the full-strength liquid starch until they are wet. I hang the petticoats up (all spread out) to dry. When you take them down they will be hard/stiff. I then iron them using regular spray starch. The petticoats will be hard and stiff when you put them on but the weight of the skirt will bring them down a little and normal wear will cause them to come down even more. The skirt should be very full and will sway (like a bell) when you walk. The costume I made for Sarah has two petticoats with ties that wrap around the waist. We put the first one on the front and then the second on the back. The ties/wraps will need to be tied as tightly as you can stand it because there are several more layers to add. If the ties are not tied tight enough, by the time you get to the belt you may not have much of a waist. I suggest tying the ends in a bow, not a knot. Why you ask? Because…by the end of the day the knots will be very hard to untie. Again, we learned this the hard way. My personal opinion is that most people do not pay close enough attention to the petticoats and the finished appearance suffers. If you have ever seen this costume worn properly, the full skirt and puffed sleeves are the first things you will notice.

7. RED SKIRT. The red skirt is worn over the petticoats and tie the ends as tight as you can stand it because you still have the apron and belt to add. Tie the ties in a bow and tuck the loops and ends over the top of the skirt and under the waist band.

8. APRON. The apron should be worn in front over the red skirt and should be the same length as the skirt; no shorter and no longer. The ties should be tied in a bow with the loops and ends tucked over the top of the skirt and under the waist band. The ties for the petticoats, skirt and apron should not show. At this point, you will want to button the vest.

9. BELT. The belt for Sarah’s costume is made of wide Czech ribbon. It has very stiff waist band stiffener sewn to the back to keep it looking nice when worn. If you don’t have the stiffener, the belt will get all folded and crinkled while wearing. The belt is important because after all of those layers you will need it to “give you a waist.” We tie the belt very tightly with a pretty bow (big loops) and the ends should be even. Just a tip we have learned…we keep a safety pin on the end of the belt because sometimes one end is longer than the other. And after getting the perfect bow, you may not want to untie it. Simply pin up the longer end to the underside, making the ends even. Voila!

10. SCARF. I am in the process of making the scarf for the neck but I want to include it for your information. The scarf is worn on the neck and pinned in front. We use an antique Bohemian garnet brooch. I would recommend using safety pins to secure the scarf in place. When worn at festivals, parades, etc. sometimes the scarf gets blown around. You do not want your scarf to blow against your face or you will get lipstick and make-up on it. Also, you will want your costume to always look its best and will want your scarf pinned in place.

11. WREATH. We finish the costume off with a wreath in the hair of multi-color flowers and ribbon streamers. You can also wear a hat. Traditionally, the wreath indicates a single woman and a hat is for married women.

12. ACCESSORIES. We have Bohemian garnet earrings and rings to wear with Sarah’s Kyjov kroj. We bought them on eBay.


I have been asked why do women put their hands on their waist when wearing this kind of costume (and others). Simple answer, there is really nothing else to do. The sleeves are so full that it just seems natural to put your hands on your waist.

Please see earlier post (from several years ago) if you are interested in making this costume.

The photo to the left is the antique costume that inspired the reproduction I made. I got pretty close, I think. On the reproduction, I signed and dated each piece I made and just for good measure I added yellow roses (honoring our home state of Texas) on the back.

I hope this information has been useful.

Sunday, April 29, 2012

It's More Than Just a Crown...

Yesterday, Saturday, April 28, 2012, the Czech Heritage Society of Texas crowned the new state queen. The pageant included all the pageantry any girl would want. Music. Master of Ceremonies. Lots of photo ops. Grand entrance. Czech crystal and many gifts for the winners. Applause. Beautifully embroidered sash. And a crown that would make any little girl's eyes twinkle.
But, by far, the best thing was to see the families together. Three (or possibly more) generations together. You see, leading up to the pageant, the young girls learn from parents, grandparents, aunts and uncles about Czech customs, traditions, recipes, kroje and language. THAT is what the Czech Slovak Queen pageants are all about. Not the fanfare that surrounds crowning the new queen but the younger generation learning all about their heritage. Some families live their Czech culture every day, others are more removed from it. In all cases, the youth will learn how their ancestors sacrificed, struggled and then celebrated in the new land we now call home.
At the Miss Texas Czech Slovak Queen Pageant yesterday, the contestants entered under a traditional canopy. They competed in four categories: personal interview, on-stage interview, kroj modeling and talent. Master of Ceremonies, Joe Janecka, introduced the panel of judges: Kristin Blair (former Miss Texas); Victor Havel and Angela Young (former Miss Czech Slovak USA). Caitlin Orsak of LaVaca County was named the 2012 Miss Texas Czech-Slovak Queen and will compete in Wilber, Nebraska. Good luck Caitlin!
The Pageant Committee spends weeks preparing for the day. Collecting prizes for the contestants. Decorations. And much more. Many thanks to committee members: Kathy Podsednik, Marianne Beran, Lee Colwell, Janis Hrncir, Helen Mikus, Evelyn Skopik and Jana Vaculik. This year the McLennan-Hill Chapter (our local chapter) hosted the event at the Knights of Columbus Hall in West, Texas. The day included a delicious meal, silent auction, traveling library, state meeting, sales booth of Czech costume designer Maggie Grmela and entertainment. The day ended with the Queen's Ball with music by the Czechaholics.

Each contestant had set up their own personal display. Some of the items included in the displays were: pictures in their kroj, trophies, Czech dolls, family heirlooms/photos and genealogy. THIS is what the day is all about. When my daughter got interested in the Czech Queen pageant, she began asking questions. She knew she was Czech but "tell me more." She (and all of these girls) learn their family Czech sir names, when and how their ancestors immigrated to America, what they wore (everyday and at special occasions), recipes, music and how they survived.

"May the love of one's heritage never fade, dim, nor die; for the future of tomorrow depends on how much you are willing to do for your past, today."...Sarah Middlebrook (2006 Miss Czech-Slovak USA Queen)

More photos from the 2012 Miss Texas Czech-Slovak Queen pageant are available at: www.facebook.com/czechcostumes. For more information on the Miss Czech-Slovak Queen Pageant, log on to: http://www.missczechslovakus.com/

Wednesday, April 25, 2012

Which Kroj Should I Wear? Vote on Facebook

The Miss Texas Czech Slovak Queen will be selected this weekend in my hometown, West, Texas. I have never worn one of my kroj creations but am thinking I may. I need your help, please vote on the costume you think I should wear. These are photos of my daughter, Sarah, in the kroje. To vote, log on to www.facebook.com/czechcostumes or click on the Facebook icon on the right before the end of the day Friday,April 27, 2012. Thanks!

Friday, March 23, 2012

Miss Texas Czech Queen to be honored with Queen's Ball


The new Miss Texas Czech Queen will be crowned on Saturday, April 28, 2012 in West, Texas. Many thanks to our reigning Queen, Miss Amy Holecek of West, Texas. What a wonderful Queen she has been! Her Little Czech Sister was Kynlie Foit.

The Czech Heritage Society of Texas is making final plans now for the pageant that will be held at the KC Hall in West. The pageant is held annually at the club's state meeting and is open to the public. Opening ceremonies will be at 9:30 a.m. On-state interviews will be at 10 a.m. and kroj modeling will follow at 11:30.

After a barbecue lunch, the CHS will hold their business meeting. The crowning of the new Queen will be at 3:30 p.m. If you plan to attend, the CHS asks that you RSVP to 254-863-5665 so that they can get an accurate meal count.

New this year, will be a QUEEN'S BALL sponsored by the McLennan-Hill chapter of the CHS. The dance is open to the public and will also be held at the KC Hall from 6-10 p.m. The cost is $8 per person. Music will be provided by THE CZECHAHOLICS.

Guests are invited to wear their Czech kroj. But if you don't have a Czech costume, the dress is casual. For more information, call 254-863-5665.

I hope you can make plans to attend. I will be sure to be there and who knows, I may even wear one of the Czech costumes I made!!! What do you think, should I?

Thursday, March 22, 2012

Antique Costume


You may recognize this costume from a previous post (May 2011). It was given to me by a reader of this blog. (Many thanks!!) It is quite old and the person who gave it to me said it has been in her family forever. The costume appears to be Bohemian, possibly from an urban setting and would have been worn by a mature woman.

I cleaned the blouse with a gentle detergent, Biz and Shout. I put a color catcher in the water just in case the black thread along the neckline started to bleed. The lace appears to be handmade, and it is beautiful. I took the vest and skirt to the cleaners. There is a white underskirt that is heavily pleated. I have not cleaned it yet; not sure how without ruining the pleats.

I still have much to do but I thought you might want to see what it looks like all put together. I will post more pictures as I make progress.

Many thanks to the fans of my Facebook Czech Costumes page for their expertise. Click the Facebook icon to the right of this page and you can follow the comments and meet others interested in Czech costumes.

Thursday, January 19, 2012

THE Dress - Conclusion


Well, as you might have guessed by now. We finished THE dress. The bride and groom were radiant and I was beaming with pride. As the doors of the church sanctuary opened, I turned to look at Kevin. The look on his face was priceless. As Sarah, escorted by her brother Eddie, started down the aisle I could not help but think how proud her father would be. But then I remembered I had a part to do. As Eddie and Sarah stopped beside my pew, Sarah took my arm as Eddie stepped up to the pulpit. Eddie, a licensed Minister since 2005, had 3 years earlier officiated at Katy's wedding and now readied himself to perform the ceremony for Sarah and Kevin.

Eddie escorted Sarah in to the sanctuary to non-traditional music for a bride's entrance. Sarah and her Dad had a favorite song that they often listened to together. "When We Say Nothing at All" by Allison Krause. It is a beautiful song and just another special way she could have her Dad with her.

Kevin stepped down the steps to meet Sarah and I and waited until Eddie asked “who gives this bride.” The week before, I pondered how I could answer that question. I know if Ed were with us, he would be giving Sarah away. He would be so proud of her choice in Kevin. He would have loved to be here and say “her mother and I do.” So, after giving it much thought, my only response could be, “for her father and I, I do.”

Sarah took Kevin's arm and I sat down. They stepped up the steps to where Eddie was waiting. The ceremony was lovely. A friend of Kevin, Mark Marksteller, delivered a special message to the bride and groom. Words of wisdom for them to live by. It was perfect. My Dad, Joe Hill, performed a solo as he had done in every family wedding since 1977. A very special moment for our family. Also, performing a solo was Sarah's 9-year-old cousin, Audrey Holloman. She did a beautiful job and we are so proud of her.

Something old: her great-grandmother's handkerchief tucked in her bouquet. Something new: jewelry and a charm that Sarah's sister-in-law, Amanda, made her with a photo of her Dad. Something borrowed: veil from Sarah's sister, Katy, and I loaned her a sapphire ring that every bride in the family has worn for more than 30 years. Something blue: a very special heart inside her dress with her Dad's photo.

And a new one, something unforgettable: THE dress.


Wedding photos by Freeze Frame Time Photography.

THE Dress (part 5)


Maggie said bring the dress over, we will see what we can do. I had not put the zipper in yet; I was afraid to. I had put in lots of zippers but the dress was so big at this point. So cumbersome and hard to work with. Maggie said she would put the zipper in, yea! Sarah put the dress on and Maggie took a look at it. In her sweet, calm, confident manner, she said there was nothing wrong. As Sarah turned to the mirror, Maggie pinched the back seam together and said she will move the zipper in just a little and...voila!

Maggie put the zipper in and we picked it up the next day. As Sarah stepped out of the dressing room, I held my breath. We were out of time. Pictures would have to be taken the next weekend or we would not have them in time for the wedding. I still had more bead work to finish and it had to go to the cleaners before the wedding. If it didn't fit-we were out of options.

Sarah faced the mirror as Maggie zipped it up. Perfect! Sarah and I looked at each other and could not quit smiling. We just kept saying. It's a dress...it's a real dress. It's a dress!

We got home and Sarah put the dress on again. She wanted to see what it looked like with the veil. If we had more time, I would have loved to make a veil but Sarah decided to borrow her sister's veil. Katy's veil was a traditional veil edged with beads and clear tear drop beads hanging from the edge. It fit with with the dress perfectly and provided her “something borrowed” for the wedding. I was standing behind her and she turned to face me. “Thanks Mom.” It was at this point, I saw the look. You know...the look of a bride who puts on the dress. The perfect one. It wasn't “the dress” anymore. It was THE dress.

That night I finished the bead work on the bodice. The beads from Alaska had, by this time, arrived and were perfect. As I sewed on these very small beads, I fought back tears. Not that I'm afraid to cry (I've cried buckets of tears the last three years) but I didn't want to get any spots on the beautiful satin. To anyone looking at the dress, they might not have noticed the tiny beads but Sarah and I knew they were there and each one reminded us of a very special trip to Alaska with Sarah's father who had passed away the year before.

My daughter, Katy, (yes the one who is about to have a baby) took Sarah's bridal portraits on Sunday, December 4. We had planned to go to Waco and take the pictures on the Baylor University campus but, wouldn't you know it, the weather had taken a very chilly turn. It was so cold and the wind was blowing so hard that Sarah said there was no way she could take pictures outside.

Well, as you now realize, time was growing short. I had to take the dress to the cleaners the next morning or there was no way we would get it back in time for the wedding. So, we improvised. I called the Associate Pastor of our church and we arranged to take the bridal portraits there. Katy took countless photos of Sarah in the beautiful sanctuary. But just as we were about to leave, Katy talked Sarah in to taking just a couple outside. It was still extremely cold. They stepped just outside the door and Katy snapped a few quick shots on a bench by the door. Then they stepped around the corner and Sarah twirled in her new wedding dress. You know the kind of twirl every little girl likes to do. This was no different. Sarah twirled and the smile on her face says it all. When I saw the picture, I saw my little six year old playing dress up again. Out of all of the photos taken that day, this was my favorite. My little girl was all grown up and I would soon see her marry her knight in shining armor. (Kevin Armor)

When we got the dress back from the cleaners, I put it on the dress form. Sarah wanted the folds of the skirt to stay in place. She wanted double folds on each panel. The wedding day would be a long day with lots of pictures with dancing. So, I took each panel, pinned it in to place and then lightly basted the folds from the underside. So, (hopefully) it would appear to just be draped in to place (with nobody seeing that it was actually stitched).

For the reception, we needed the dress to be just a little shorter so that Sarah would not trip on it and so it would not get stepped on. Maggie had showed us how to do a bustle in the back so Sarah got a beautiful vintage-looking brooch to cover the pins that we would need to pin the dress up. I sewed snaps on the underside of each skirt panel to raise the dress about 4” off the floor for dancing. We decided we would just have to pin the underskirt up, because we really did not have time for anything else. We were not sure this was all going to work so I said a little prayer and kept my fingers crossed.

On the inside of Sarah's dress, I put a small sapphire-colored heart with a photo charm of her father. Sarah and Kevin chose sapphire as the wedding color because it was her father's, Ed's, birthstone. Nobody else would see the heart and charm but we knew it was there. I sewed it on the inside of the dress in the middle of her back. I know that is where Ed's hand would have been. Offering love and support as she was waiting for the ceremony to begin. And at the reception, you can be sure that is where Ed's hand would be as he showed off his baby girl.

Tomorrow, the conclusion.

Wednesday, January 18, 2012

"The Dress"- The Incredible Shrinking Bride (part 4)


Well, I took Maggie's advice and was able to finish the bodice and had to admit it looked pretty good. So, I turned my attention to finishing the panels of the skirt. Each panel was very time-consuming. I have never worked with bridal satin before, so getting each panel to lay just like I wanted, was a real challenge.

As I turned the panels right side out, I noticed that since I was unable to press the seams open as I usually do, they would not drape like Sarah wanted. I went to bed that night trying to find the words to tell Sarah that it just wasn't going to happen. I could not do it.

At 2:33 am I woke up and thought of an idea. I got up and went back to the sewing room. I proceeded to turn the panel right side out and then very carefully, while pinching the seam, baste it together to allow me to press it. Much to my surprise (shock), this worked. When I hung the first finished panel on the dress form and turned the folds out, I could have sat down right there and cried happy tears. Or, possibly could have been tears of exhaustion. I realized I had been up all night.

The skirt has 7 panels so you can imagine how much precious time this took. I would wake up at 5 am each morning, quickly get ready for work, and then work on the dress until it was time to leave for work. After work, I would get home and make a salad for supper and then right back at it, working until I just could not see anymore.

As I was nearing completion on the skirt, I asked Sarah what she wanted the underskirt (we never knew what to call this) to be made of? Since the skirt of the dress had the panels that fold open, it needed an underskirt. The Princess' dress that inspired Sarah had antique lace but Sarah wasn't sold on the idea of lace. She was thinking of a brocade but we tried a few and they just did not look right. We didn't have antique lace so I found a couple of laces that I thought would work. Sarah chose a beautiful vintage-looking Chantilly lace. A very delicate, all-over pattern. The underskirt was made of taffeta because the dress was getting very heavy. The taffeta was light weight and the lace was sewn to it. This worked pretty well. For the most part, the lace would not be seen very much...except when she was dancing! And then under the very heavy, draped skirt you would see a feminine lace skirt.

At this point, I started feeling like maybe Sarah will have “the dress” she SO wanted. But, we faced another challenge...the incredible shrinking bride. Sarah, as most brides, was watching her diet, working out and she began losing weight. Between me and you she was under a lot of stress, too. She was finishing up her Bachelor's degree. Her graduation was the same day as the wedding. Needless to say, she chose to go to the wedding. Working as a bank teller. Planning a wedding and every time she came home, there was yet ANOTHER problem with “the dress.”

Now the dress was too big! It was the last weekend in November. I was almost out of time. “Maggie...help.”

To be continued tomorrow...

Tuesday, January 17, 2012

"The Dress" - Tears! ...but it's just not me, Mom (part 3)


SO, now I have to cut the dress out! I started with the small pieces, the bodice. With basting stitches I outlined the bodice piece and then I cut around the bodice piece leaving enough fabric for the embroidery hoop. I traced the embroidery design on to tissue paper and then positioned it on to the bodice piece. I carefully basted around the designs with white thread and then tore the tissue away leaving the basting stitches as a guide for the embroidery.

I would send ideas, suggestions and choices to Sarah at each step. (She was away at college in Denton, Texas, which is about 1 ¾ hour drive away.) We had different ideas of how the finished design should look. I wanted to mainly use the Swarovski crystals, beads and pearls with very little embroidery but Sarah wanted more of my embroidery with very small embellishments. So after much discussion I chose to do satin stitches for the leaves and the larger balls (flowers?) and a simple outline stitch for the vines. This is the embroidery. Simple, elegant, classic. Just what Sarah wanted.

The next step was to pick the beads and crystals. Again, I sent Sarah some suggestions and she picked what she liked best. It was at this point that I was discussing “the dress” with a co-worker. As it turned out she and her mother like to do bead work. She suggested very teeny-tiny beads like she uses. Since they were so tiny, it would only add texture and sparkle without taking away from the embroidery. Perfect! She suggested an online store she used...in Alaska. This may not mean anything to anyone else but Sarah and I have very fond memories of a trip we took to Alaska with my late husband, Sarah's very dear father in 2007. I ordered the beads from Alaska and continued putting the embellishments on the bodice.

After I finished the embroidery on the bodice (note, the design in the photo is unfinished), I turned my attention to the skirt. I took each pattern piece with the extensions/wings and cut out one panel at a time.

I sewed each panel (right sides together) stopping at the line-marker on the pattern to determine where shortening or lengthening would be. Since the pattern I was using as a base called for an empire waist, (not straight across) I could not measure from the top to stop the seam. Since this was ALL trial and error I really had no way of knowing if this would work.

The Vogue pattern I was using as a base had a pattern for a small cap sleeve. Sarah liked that so I put in the sleeves and had several of the skirt panels for Sarah to see when she came home one weekend in late October. I have to admit the dress looked pretty good pieced together on the dress form so I felt pretty good about Sarah coming home from college to try it on. The sleeves looked great BUT when she put it on she could not move her arm. I could not imagine what I had done wrong but really did not have the time to re-do it. So Sarah and I went to see Maggie to see what I could possibly do. Maggie suggested trimming the armhole a bit and using bias tape made from the bridal satin and finish it off to make a sleeveless dress. We thought that might work. Sarah did not really want a strapless dress but she liked the way the dress looked without the sleeves. So, ok.

At this point, we had to go to the local bridal shop to pick up the bridesmaids dresses. As we walked through the store I could not help notice the way Sarah looked at the girls trying on the beautiful wedding dresses...finished, fitted wedding dress. At this point, I was ready to scrap the whole wacky notion of me, somehow, being able to make Sarah's dress. This would be her wedding day...it should be perfect. At my urging, Sarah tried on a few dresses. Her eyes would light up when she put them on. I talked her in to letting me buy her a dress. A beautiful, beaded dress that needed only a few tucks and would fit her perfectly. A lady came out of the back, pins in hand, to pin the dress for alterations.

Then it happened...tears! Again Sarah said it...”these dresses are beautiful, Mom, but it's just not me.” She said all of the dresses we looked at were "cookie-cutter" dresses and just not her.

So we thanked them for their time and went home to see if there was any way I could save “the dress.”
To be continued tomorrow...

"The Dress" (part 2)


After looking at the local fabric store and seeing their limited selection, I decided I would need to order the fabric online. I have a full time job and the weekends were full so I was unable to go to Dallas, Austin or Houston to the larger fabric stores. Maggie Grmela recommended http://www.fabric.com/. Great suggestion!

I found the satin I wanted. Medium weight duchess white satin. I was not sure that medium weight was correct. But light weight would not have worked with the dress Sarah wanted. Since the skirt had folds that would need to keep their place, light weight just would not do. Same thing with heavy weight. I was afraid that the heavy weight fabric would not drape the way we needed it to.

Now this is where it gets scary. How much do I order??? The fabric was reasonably priced but I did not want to order too much and I certainly would not want to run out. Luckily, the fabric I chose was a fabric that the website said that much was available and is always on hand. The Vogue pattern called for 10 yards of fabric with a different lining fabric. But I knew that I would have to line it with the same fabric since the folds of the skirt would be turned out. Also, because the panels of the skirts would be much larger to allow for the folds, I guessed 20 yards at least. Then, if time allowed, I wanted to make a detachable train. Another 10 yards? What if I made a mistake cutting the fabric? After considering all of this, I ordered 35 yards on October 5, 2011.

With the fabric ordered, I turned my attention to the embroidery and bead design. Sarah wanted the design just along the neckline. Thank goodness! I would never have been able to do any more before mid-November. Like most brides, Sarah did not want Kevin to see “the dress” but she did want his input. Keep in mind that Kevin knows that all I made lately are Czech costumes. So, I think he was getting a little worried about what kind of dress I would make. Understandably so! In Nebraska, Sarah wore all of her kroje. So he saw first hand how really pretty they are, but let's get real, that kind of a dress would be a bit out there for a wedding. No worries!

We assured Kevin that, though Sarah's dress was shaping up to be original and very unique, it would not look like her Czech costumes. So, as I looked for embroidery designs I wanted something that I would be able to do in a short amount of time, did NOT look like embroidery from a costume and something that was more in keeping with the design. The only way I can describe the dress is classically elegant. I gave Sarah several choices for a design but the one she chose (not surprisingly) came from a vintage embroidery book I had ordered a year or so ago. The design was for a simple summer dress but when Swarovski crystals, pearls and beads were added it would be perfect! See the photos for the design but the photo was taken on a practice dress and is not the fabric I used.

The only other suggestion Kevin had was that he did not want it so “bunchy” that they could not dance. No problem. Sarah and I secretly knew that if we could, somehow, make the dress she wanted, it would be perfect for dancing...especially for the Grand March and polkas!

I made a practice dress (not fully put together) to see if I could get the folds of the skirt correctly. I took the pattern pieces for each panel and added, what I can only refer to as, 'wings”. Making the practice dress really helped. Even though I did not have time to finish it like I should have, at least I could get the skirt panels correct.

When the fabric arrived, I could not wait to get home from work to open it. It was absolutely perfect. I rolled it out on the table and thought...”now what?”
To be continued tomorrow...

Monday, January 16, 2012

Blessings and "The Dress"


Shortly after our trip to Nebraska in August for Czech Days, our life took a very hectic turn. All the very best blessings. First of all, both my daughter Katy and my daughter-in-law are expecting baby girls. They are due in the next few weeks! I have one grandchild, Katie, who is 20 months old. I will have three granddaughters, all under the age of 2 years. How very exciting!!

And another very exciting blessing! A new son-in-law. Just a few weeks after our trip to Nebraska, Kevin Armor, asked for my daughter, Sarah's, hand in marriage. When Kevin and Sarah came home for our annual Czech festival, Westfest, he took me aside and asked for her hand and I gladly approved. They got engaged in September. They began planning a December 17th wedding (and here is the kicker) Sarah tells me she wants ME to make her wedding dress. ACK!

I decided to journal the adventure of making “the dress” which I will write out in my handwriting and seal with the dress when it is preserved. Since “the dress” was the reason I was AWOL from the blog for so long, I will share the tale with you. I hope you find it interesting. Here it is...

For several years, my youngest daughter, Sarah, has told me that she wants me to make her wedding dress. Even if I had a year to make her dress, I still would be very hesitant. Let's be honest, I am no seamstress. I only have basic sewing skills. I can follow a simple pattern but have never had to alter a pattern or a finished garment. Yes, I can do embroidery but given that I only had a few weeks to make the dress, I would not even be able to do much needlework. So, I tried desperately to get her to change her mind. I was so afraid of letting her down on what should be the best day of her life. She was certain I could create her dress. Me, not so much.

Since 2006, I have learned how to make a few Czech costumes. I started with a basic sewing knowledge that my mother, Peggy (Nix) Hill, shared with me when growing up and my grandmother's Singer sewing machine (circa early 1900's). When my girls were young I did a little more sewing and made much of their clothes. All very simple dresses, rompers, etc. All with a pattern and guidance from my mother. When I decided to make Czech costumes for my daughter, I was incredibly blessed to have help from a renown Czech costume designer, Maggie Grmela. I called, emailed and visited her many times with what she surely thought the most elementary of questions but she always helped me so patiently.

After Sarah and Kevin's engagement was announced, she again told me she wanted me to make her dress. This was the end of September, was she kidding? Nope. Sarah saw a photo of a dress she liked online. The dress she liked did not have any beading or embroidery. Whew! But, she would like me to do some embroidery and bead work. “Well...we will see what I can do.” I mean, after all I only had a few weeks. The dress would need to be finished by mid November so that she could take bridal portraits. Even now remembering this, I can feel my heart racing and blood pressure going up!

Well, since there was no changing Sarah's mind, I began asking experienced seamstresses for help. I turned to a childhood friend, Sally (Sutterfield) Castellano of Sally Sews. Sally was my best friend growing up. As a matter fact, she was my maid-of-honor when I got married in 1980. Sally moved to Oklahoma years ago, but we reconnected a while back thanks to Facebook. Sally was a big help. She sent me a list of tips and offered support and advice throughout the process. Thanks Sally! As I mentioned before, Maggie Grmela, was a huge help. I will go in to more detail later.

After one last ditch effort to get Sarah to change her mind, I decided to get started. (What was the last ditch effort you ask?) I searched online for bridal stores near her in Denton, Texas, for dresses that would be available for in-store purchase. After all, if you order a dress these days it can take months to come in. I bombarded, yes bombarded, Sarah's email and text messages with beautiful dresses for her to consider. All with a return response that they are pretty, “but just not me, Mom.”

Luckily, the dress that inspired Sarah's design was a somewhat famous dress that was worn by the Crown Princess of Denmark, Mary McDonaldson. I was able to find sketches and descriptions online, that at least gave me a starting place. The dress was elegant and unique. The Crown Princess' dress featured a boat-neck with ¾ sleeves (known as calla sleeves). Sarah did not care for the boat-neck. She said it looked like it did not fit. Fine with me, I would not know how to do that kind of neck line anyway. She also did not like the sleeves. The focal point, and what really attracted Sarah to this design, was the skirt. The skirt appeared to me made of several panels that folded back. Hmmmm....how do I do that? Sally helped me find a pattern (Vogue #2788) that I could modify. Sarah liked this neckline better. Wonderful!

So, with a design in mind I began looking at fabric. I don't know anything about bridal fabric, so I asked Maggie. I took my general idea to Maggie and she gave me some advice and tips. She showed me a wedding dress that she was altering. Fabric weight. Boning. Bodice stiffener. Horsehair braid (what the heck was that?). Dress needs to be fully lined. My pen was swiftly writing all of this down as Maggie spoke. My head was spinning when I left her house. What was I doing? I have a full time job, could I really do this? I told myself that I would at least try. Worst case scenario, if this did not work out Sarah would have to buy a wedding dress off the rack. I'll be honest here. Before I started, I did a lot of praying. I know that a wedding dress may not be high on God's list of priorities right now but I knew I couldn't do it unless I turned it all over to Him. I'll admit that I have always trusted God but the last few years have taught me that God is not only with us. He will see us through all things. Nothing is too large or too small to leave at His feet. So that is where I left it...
To be continued tomorrow...